A thorough beehive inspection checklist is crucial for keeping bees healthy and productive. By following these 10 essential steps, you can effectively inspect brood frames and honey stores, ensuring your hives thrive and address any potential issues promptly.

Table of Contents
Step 1: Gather Your Beekeeping Equipment
Prepare Your Tools in Advance
Before heading to the hive, ensure you have all necessary tools prepared and sanitized. This includes a hive tool, smoker, bee brush, and protective clothing. Clean and inspect all equipment to ensure it’s in good working condition. Make sure your smoker has enough fuel and is ready to use. Lay out your tools in an organized manner to easily access them during the beehive inspection.
- Clean and inspect all equipment to ensure it’s in good working condition.
- Make sure your smoker has enough fuel and is ready to use.
- Lay out your tools in an organized manner to easily access them during the inspection.
Wear Proper Protective Gear
Protective gear is essential to safeguard yourself from stings and potential injuries while keeping bees. Always wear a bee suit, gloves, and a veil to prevent any direct contact with bees during your beehive inspection. Ensure your bee suit fits properly and covers all exposed skin. Check for any holes or damage in your protective gear. Wear light-colored clothing as bees are less likely to be aggressive towards lighter shades.
- Ensure your bee suit fits properly and covers all exposed skin.
- Check for any holes or damage in your protective gear.
- Wear light-colored clothing as bees are less likely to be aggressive towards lighter shades.
Light Your Smoker
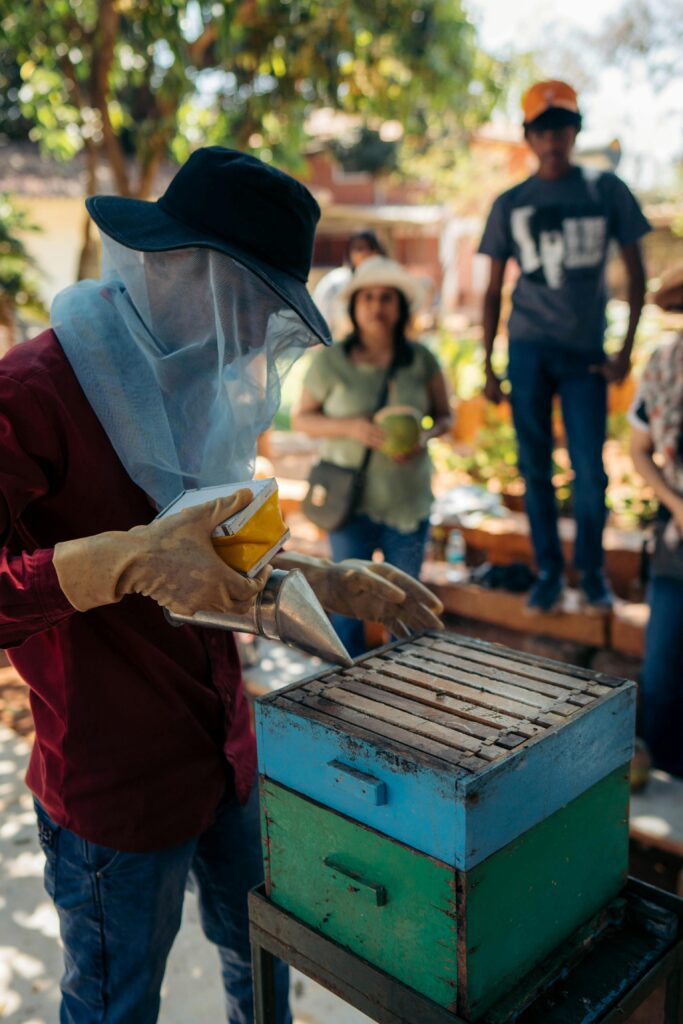
A smoker calms the bees, making it easier to conduct a beehive inspection. Light your smoker and keep it handy throughout the inspection. Use natural materials like pine needles or burlap for smoker fuel. Ensure the smoke is cool and not too hot to avoid harming the bees. Test the smoker to make sure it produces a steady stream of smoke.
- Use natural materials like pine needles or burlap for smoker fuel.
- Ensure the smoke is cool and not too hot to avoid harming the bees.
- Test the smoker to make sure it produces a steady stream of smoke.
Step 2: Approach the Hive Calmly
Move Slowly and Gently
Bees are sensitive to sudden movements and vibrations. Approach the hive calmly to avoid agitating the bees. Walk slowly and avoid sudden jerks or rapid hand movements. Speak softly if you need to communicate with others during the beehive inspection. Avoid strong perfumes or scents that may irritate the bees.
- Walk slowly and avoid sudden jerks or rapid hand movements.
- Speak softly if you need to communicate with others during the inspection.
- Avoid strong perfumes or scents that may irritate the bees.
Use Minimal Smoke
While smoke is essential, use it sparingly to avoid overstressing the bees. A few gentle puffs at the entrance and top of the hive should suffice. Direct the smoke towards the hive entrance and wait a few moments. Apply smoke in small, controlled amounts as you progress through the inspection. Observe the bees’ behavior and use more smoke only if necessary.
- Direct the smoke towards the hive entrance and wait a few moments.
- Apply smoke in small, controlled amounts as you progress through the inspection.
- Observe the bees’ behavior and use more smoke only if necessary.
Observe the Hive’s Entrance
Before opening the hive, spend a few minutes observing the bees’ activity at the entrance. This can give you valuable insights into the colony’s health. Look for bees carrying pollen, indicating active foraging. Check for signs of robbing or aggressive behavior towards other bees. Note the overall activity level and any unusual behavior.
- Look for bees carrying pollen, indicating active foraging.
- Check for signs of robbing or aggressive behavior towards other bees.
- Note the overall activity level and any unusual behavior.
Step 3: Open the Hive Carefully
Remove the Hive Cover
Gently remove the hive cover to avoid disturbing the bees. Use your hive tool to pry it open if necessary. Lift the cover slowly and set it aside without making loud noises. Be cautious of bees on the cover and gently brush them back into the hive if needed. Inspect the underside of the cover for any signs of pests or mold.
- Lift the cover slowly and set it aside without making loud noises.
- Be cautious of bees on the cover and gently brush them back into the hive if needed.
- Inspect the underside of the cover for any signs of pests or mold.
Inspect the Inner Cover
Check the inner cover for any signs of moisture or pests. This step can help identify potential issues early. Look for condensation or mold on the inner cover. Check for small hive beetles or other pests hiding in the cover. Ensure the inner cover is intact and free from cracks or damage.
- Look for condensation or mold on the inner cover.
- Check for small hive beetles or other pests hiding in the cover.
- Ensure the inner cover is intact and free from cracks or damage.
Pry Open the Frames Gently
Using your hive tool, gently pry open the frames to avoid damaging the comb or crushing bees. Start with the outermost frames and work your way inward. Move the frames slowly and carefully to minimize disturbance. Use the hive tool to separate any propolis that may be sticking the frames together while keeping bees.
- Start with the outermost frames and work your way inward.
- Move the frames slowly and carefully to minimize disturbance.
- Use the hive tool to separate any propolis that may be sticking the frames together.
Step 4: Inspect Brood Frames
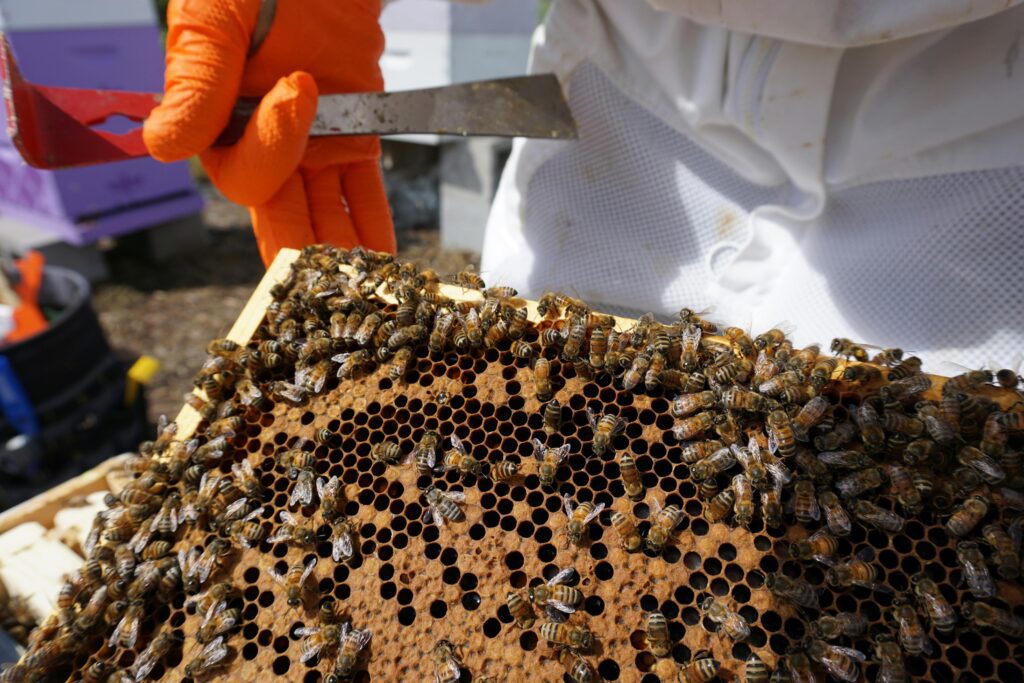
Look for Brood Patterns
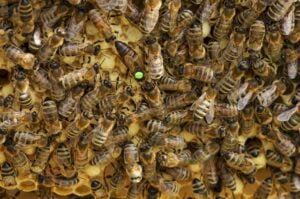
Inspect brood frames for healthy patterns, including capped brood, larvae, and eggs. Healthy brood patterns indicate a productive queen. Discover 6 Fascinating Ways Queen Bees Impact Hive Behavior. Check for a solid pattern of capped brood without significant gaps. Look for white, pearly larvae and eggs in the cells. Ensure the brood is evenly distributed across the frames.
- Check for a solid pattern of capped brood without significant gaps.
- Look for white, pearly larvae and eggs in the cells.
- Ensure the brood is evenly distributed across the frames.
Identify Potential Issues
Be on the lookout for any signs of diseases or pests within the brood area. Watch for symptoms like discolored larvae or uneven brood patterns. Check for signs of chalkbrood, American foulbrood, or other diseases. Look for pests such as varroa mites or small hive beetles.
- Watch for symptoms like discolored larvae or uneven brood patterns.
- Check for signs of chalkbrood, American foulbrood, or other diseases.
- Look for pests such as varroa mites or small hive beetles.
Evaluate Queen Health
Assess the queen’s health by observing the brood patterns and looking for the queen herself. Locating the Queen Bee – 10 Proven Tips for Beekeepers. A healthy queen should be laying eggs consistently with minimal gaps. Look for the queen’s presence and ensure she is active and not injured. If the queen is absent or laying poorly, consider replacing her.
- A healthy queen should be laying eggs consistently with minimal gaps.
- Look for the queen’s presence and ensure she is active and not injured.
- If the queen is absent or laying poorly, consider replacing her.
Step 5: Inspect Honey Stores
Check Honey Frames
Inspect the honey frames to ensure the colony has adequate food stores, especially going into winter. Look for capped honey cells which indicate stored honey. Ensure there is a sufficient amount of honey for the colony’s needs. Check for signs of fermentation or crystallization when you inspect honey stores.
- Look for capped honey cells which indicate stored honey.
- Ensure there is a sufficient amount of honey for the colony’s needs.
- Check for signs of fermentation or crystallization in the honey.
- Modern Honey Production: 12 Proven Methods to Boost Output
Assess Nectar and Pollen Stores
Evaluate the amount of nectar and pollen stored in the hive as these are crucial for the colony’s nutrition. Look for frames with stored nectar and pollen in the cells. Check for fresh pollen, which indicates active foraging. Ensure there is a balance of honey, nectar, and pollen in the hive.
- Look for frames with stored nectar and pollen in the cells.
- Check for fresh pollen, which indicates active foraging.
- Ensure there is a balance of honey, nectar, and pollen in the hive.
Look for Signs of Robbing
Robbing can deplete the colony’s food stores. Watch for signs that other bees or insects are stealing honey. Look for chewed or damaged cappings on honey cells. Observe the entrance for fighting or aggressive behavior. Check for reduced honey stores compared to the last beehive inspection.
- Look for chewed or damaged cappings on honey cells.
- Observe the entrance for fighting or aggressive behavior.
- Check for reduced honey stores compared to the last beehive inspection.
Step 6: Inspect Hive Condition
Check for Structural Damage
Inspect the hive structure for any signs of damage or wear that could affect the colony’s health. Look for cracks or gaps in the hive boxes and covers. Check the condition of the frames and foundation. Ensure the hive is well-sealed to protect against weather and pests.
- Look for cracks or gaps in the hive boxes and covers.
- Check the condition of the frames and foundation.
- Ensure the hive is well-sealed to protect against weather and pests.
Look for Moisture Issues
Excessive moisture can lead to mold and other problems in the hive. Check for signs of dampness. Inspect the bottom board for standing water or excessive moisture. Look for mold or mildew on the frames and hive walls. Ensure proper ventilation to reduce moisture buildup.
- Inspect the bottom board for standing water or excessive moisture.
- Look for mold or mildew on the frames and hive walls.
- Ensure proper ventilation to reduce moisture buildup.
Assess Hive Cleanliness
A clean hive is crucial for the health of the colony. Remove any debris or dead bees from the hive. Clean the bottom board of any debris or buildup. Remove any dead bees or other insects from the hive. Check for signs of pests or infestations that need addressing.
- Clean the bottom board of any debris or buildup.
- Remove any dead bees or other insects from the hive.
- Check for signs of pests or infestations that need addressing.
Step 7: Monitor for Pests and Diseases

Look for Varroa Mites
Varroa mites are a common and serious pest for honey bees. Inspect brood frames and the bees for signs of mite infestation. Look for mites on adult bees and in the brood cells. Check drone brood for higher mite infestation. Use a sticky board or alcohol wash to monitor mite levels.
- Look for mites on adult bees and in the brood cells.
- Check drone brood for higher mite infestation.
- Use a sticky board or alcohol wash to monitor mite levels.
Check for Small Hive Beetles
Small hive beetles can cause significant damage to the hive and honey stores. Look for beetles on the bottom board and in the corners of the hive. Check for beetle larvae in the hive and honeycomb. Use traps or treatments to control beetle populations if necessary.
- Look for beetles on the bottom board and in the corners of the hive.
- Check for beetle larvae in the hive and honeycomb.
- Use traps or treatments to control beetle populations if necessary.
Identify Signs of Disease
Be vigilant for any signs of diseases such as American foulbrood, European foulbrood, or chalkbrood. Look for discolored or sunken brood caps. Check for foul smells or unusual odors. Observe for mummified larvae or other abnormal brood conditions.
- Look for discolored or sunken brood caps.
- Check for foul smells or unusual odors.
- Observe for mummified larvae or other abnormal brood conditions.
Step 8: Record Your Findings
Take Detailed Notes
Documenting your findings during each beehive inspection helps track the hive’s health and progress. Record the date and time of the inspection. Note any significant observations or issues discovered. Keep a record of the colony’s brood patterns, honey stores, and overall health.
- Record the date and time of the beehive inspection.
- Note any significant observations or issues discovered.
- Keep a record of the colony’s brood patterns, honey stores, and overall health.
Use a Beekeeping Journal
A dedicated beekeeping journal can help organize your notes and track your colonies over time. Create sections for each hive and update them after every inspection. Include details about weather conditions and foraging activity. Use the journal to plan future beehive inspections and tasks.
- Create sections for each hive and update them after every inspection.
- Include details about weather conditions and foraging activity.
- Use the journal to plan future inspections and tasks.
Take Photos for Reference
Photographs can be an invaluable tool for tracking changes and identifying issues in the hive. Take clear, close-up photos of brood patterns, honey stores, and any abnormalities. Compare photos over time to spot trends and changes in the colony. Use photos to track progress and diagnose problems.
- Take clear, close-up photos of brood patterns, honey stores, and any abnormalities.
- Compare photos over time to spot trends and changes in the colony.
- Use photos to track progress and diagnose problems.
Step 9: Analyze and Interpret Data
Review Inspection Notes
Regularly review your inspection notes to identify trends and make informed decisions. Compare current inspections with past records to spot changes. Look for patterns in brood health, honey production, and pest levels. Use the data to adjust your beekeeping practices and improve hive management.
- Compare current inspections with past records to spot changes.
- Look for patterns in brood health, honey production, and pest levels.
- Use the data to adjust your beekeeping practices and improve hive management.
Analyze Trends
Trends over time can provide insights into the hive’s health and productivity. Look for consistent patterns or anomalies in your inspection data. Identify any recurring issues or improvements. Use this information to refine your beekeeping techniques and strategies.
- Look for consistent patterns or anomalies in your inspection data.
- Identify any recurring issues or improvements for keeping bees.
- Use this information to refine your beekeeping techniques and strategies.
Plan Future Actions
12-Month Beekeeping Schedule: Essential Roadmap to Success
Based on your data analysis, plan future actions to maintain or improve hive health. Schedule necessary treatments or interventions. Plan for seasonal changes and prepare the hive accordingly. Set goals for the colony’s growth and productivity.
- Schedule necessary treatments or interventions.
- Plan for seasonal changes and prepare the hive accordingly.
- Set goals for the colony’s growth and productivity.
Step 10: Close the Hive Properly
Replace Frames and Covers Carefully
After completing the inspection, carefully replace the frames and covers to avoid disturbing the bees. Ensure all frames are in their original positions. Gently place the inner and outer covers back on the hive. Avoid crushing bees when replacing the covers.
- Ensure all frames are in their original positions.
- Gently place the inner and outer covers back on the hive.
- Avoid crushing bees when replacing the covers.
Secure the Hive
Make sure the hive is secure to protect it from weather and pests. Check that all hive components are properly aligned and sealed while keeping bees. Ensure the hive entrance is clear and unobstructed. Place weights or straps on the hive if necessary to prevent wind damage.
- Check that all hive components are properly aligned and sealed.
- Ensure the hive entrance is clear and unobstructed.
- Place weights or straps on the hive if necessary to prevent wind damage.
Reflect on the Inspection
Take a moment to reflect on the beehive inspection and plan any necessary follow-up actions. Note any immediate issues that need addressing. Plan for any treatments or hive maintenance required. Set a schedule for the next beehive inspection and any follow-up tasks.
- Set a schedule for keeping bees and any follow-up tasks.
- Note any immediate issues that need addressing.
- Plan for any treatments or hive maintenance required.
Additional Resources
USDA PROGRAMS AND RESOURCES TO SUPPORT BEEKEEPERS
Conclusion
Having a detailed beehive inspection checklist is essential for keeping bees healthy and productive. By following these 10 steps, you can thoroughly inspect brood frames and honey stores, ensuring the wellbeing of your hives. Consistent inspections help identify and address issues early, promoting a thriving beekeeping operation. Happy beekeeping!

